

Key Takeaways
- Land Rover oil leaks often stem from heat-related degradation of gaskets and seals over long-term use.
- Identifying the root cause before starting repairs prevents unnecessary disassembly and saves significant labor time.
- Proper maintenance requires specialized tools and adherence to exact torque specifications to protect aluminum engine components.
- Routine inspections and using high-quality components can significantly extend the lifespan of your engine’s sealing surfaces.
- Early diagnosis of leaks is critical for avoiding further damage to sensitive components like turbochargers and variable valve timing systems.
Common sources of oil leaks in Land Rover models
Land Rover owners often face unique challenges when shielding their engines from unwanted fluid loss. The sophisticated design of these vehicles creates cooling and lubrication demands that fluctuate significantly under load, eventually testing the integrity of factory seals. When these rubber or metal gaskets begin to fail, owners notice the telltale signs that suggest something more is at play than simple neglect.
Valve cover gaskets and timing cover issues
Valve cover gaskets are frequently the first point of failure, largely due to their position at the top of the engine where heat accumulates most intensely. Over time, the materials harden and lose their elasticity, allowing oil to seep out and often drip directly onto the exhaust manifold. This contact produces a distinct burning scent that serves as a common indicator.
Rear main seal failure symptoms
Rear main seal leaks are particularly labor-intensive because they typically require separating the transmission from the engine. Drivers may notice oil pooling on the bell housing or ground, often appearing between the engine and transmission, which necessitates a significant amount of disassembly for access.
Oil cooler and oil filter housing vulnerabilities
Many modern platforms utilize integrated oil cooler and filter housing systems that are prone to localized gasket degradation. If you are worried about such issues, Eurosport provides expert diagnostics for these specific components to keep your engine reliable. These parts often experience varied temperature cycles that accelerate the rot of underlying O-rings.
Oil pan gasket degradation over high mileage
As the vehicle reaches higher mileage, the oil pan gasket often succumbs to the pressure of regular road vibrations and thermal expansion. This gradual wearing process, detailed in common engine oil leak points, can lead to slow drips that eventually require subframe adjustments to reach effectively.
Diagnosing an oil leak before starting a repair
Deteriorating a leak requires a methodical approach that avoids the temptation of quick guesses. Because the path of gravity often carries oil far from its origin, the visual evidence is frequently misleading to the untrained observer. Taking the time to clean the engine bay and track the accumulation pattern is a necessary step before committing to any mechanical work.
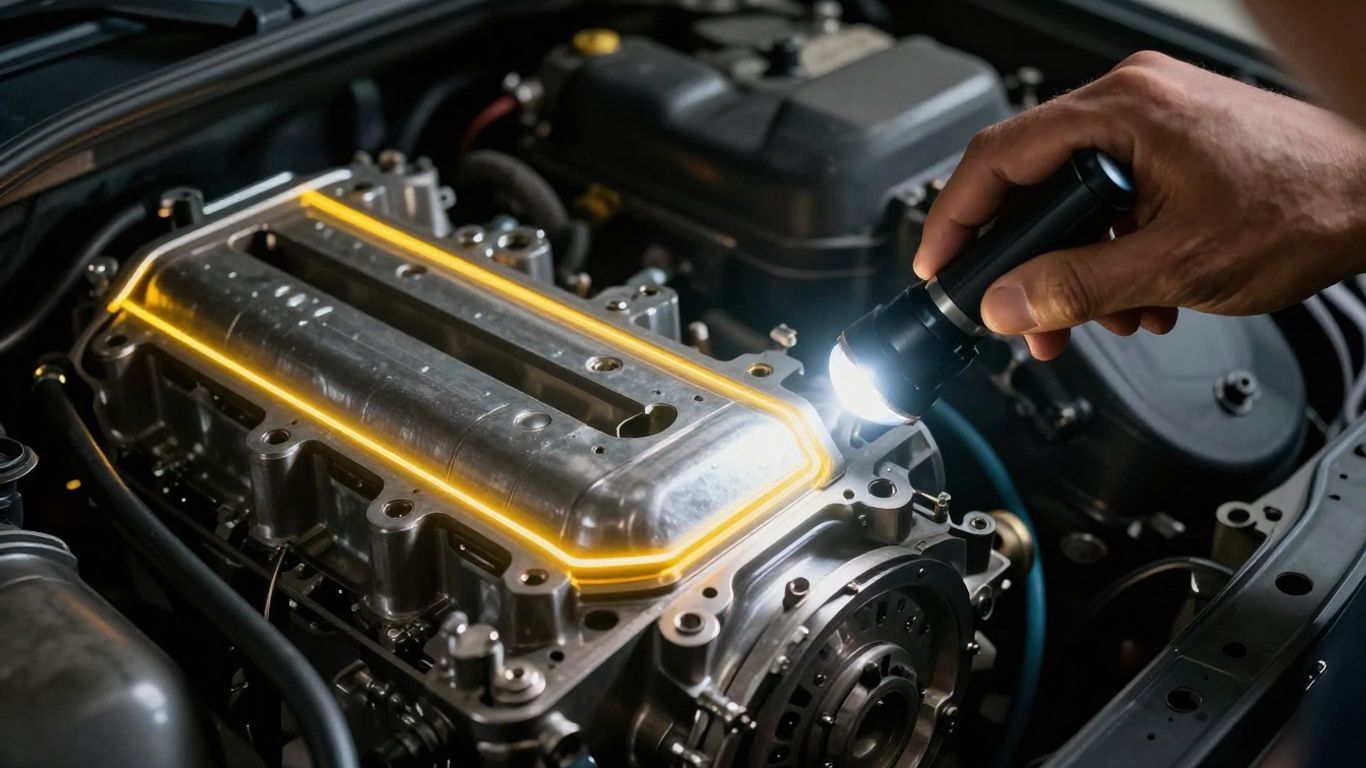
Visual inspection techniques for identifying drips
Performing a visual inspection starts with ensuring the engine is cool enough to touch safely, allowing for a thorough check along the seams. By looking for dark, stained wet areas where dust has accumulated disproportionately, technicians can trace the path of oil flow back to a likely source.
Using UV dye to trace elusive leaks
When surface stains are inconclusive, introducing a UV-sensitive dye into the engine oil is the most effective way to pinpoint the exact breach. With the engine running for a short period, the dye illuminates clearly under a blacklight, allowing for precise identification. For those struggling with this, the professionals at Green’s Garage utilize these specialized diagnostic methods to prevent the mistake of replacing the wrong components.
Distinguishing between engine oil and other vehicle fluids
It is vital to confirm that the moisture you see is actually engine oil rather than coolant or power steering fluid. Transmission fluid is typically thinner and clearer, while coolant often feels more slick and carries a distinct, sweeter scent that contrasts with the darker, heavier viscosity of engine motor oil.
Recognizing the difference between weeping and active leaks
Understanding current condition is vital for prioritizing repairs, as minor weeping is common in high-mileage engines. Active leaks, however, show fresh, running fluid and pose an immediate risk of dripping onto vital belts or electrical connectors, which could induce more complex failures.
Essential tools for Land Rover engine maintenance
Having the right hardware is essential when dealing with the tight engine bays and delicate aluminum structures found in these models. Attempting to force components or using improper leverage can lead to stripped bolts or cracked housings that are far more expensive to repair than the original leak. We recommend assembling a specific kit to handle the rigors of this work safely.
Specialized sockets for tight engine bays
Working on modern luxury engines often requires thin-walled sockets that can reach fasteners tucked behind brackets and sensors. Using standard sizes without the correct profile risks rounding off bolt heads in cramped spaces.
Torque wrenches for precision bolt tightening
The following tools are indispensable for any serious maintenance effort:
- High-precision torque wrenches calibrated for low-to-medium tension.
- Deep-well sockets made of hardened chrome-vanadium steel.
- Long, flexible-head wobbly extensions for reaching hidden cover bolts.
- Magnetic bolt retrieval tools for recovering small items in the bay.
Using accurate tools ensures that each gasket is compressed evenly, preventing future leaks caused by uneven tension across the cover interface.
Proper removal tools for stubborn gaskets
Old gaskets often bond securely to metal surfaces, requiring soft scrapers that won’t score or damage the soft alloy underneath. Plastic or nylon-based tools are typically preferred to safely clear existing debris before installing replacement seals.
Safety gear for handling hot fluids
Standard safety protocol, including chemical-resistant gloves and eye protection, is mandatory when draining oil or cleaning engine parts. You should always be prepared for incidental splashes, as hot fluids can be irritating to the skin and eyes.
Step-by-step approach to common gasket replacements
Following a structured repair path ensures that your work remains consistent and reliable throughout the reassembly phase. Maintaining a clean workspace is half the battle; contaminants left on mating surfaces will lead to premature failure of the new seal. Proper surface preparation allows the new component to seat flush against the engine, creating a lasting barrier.
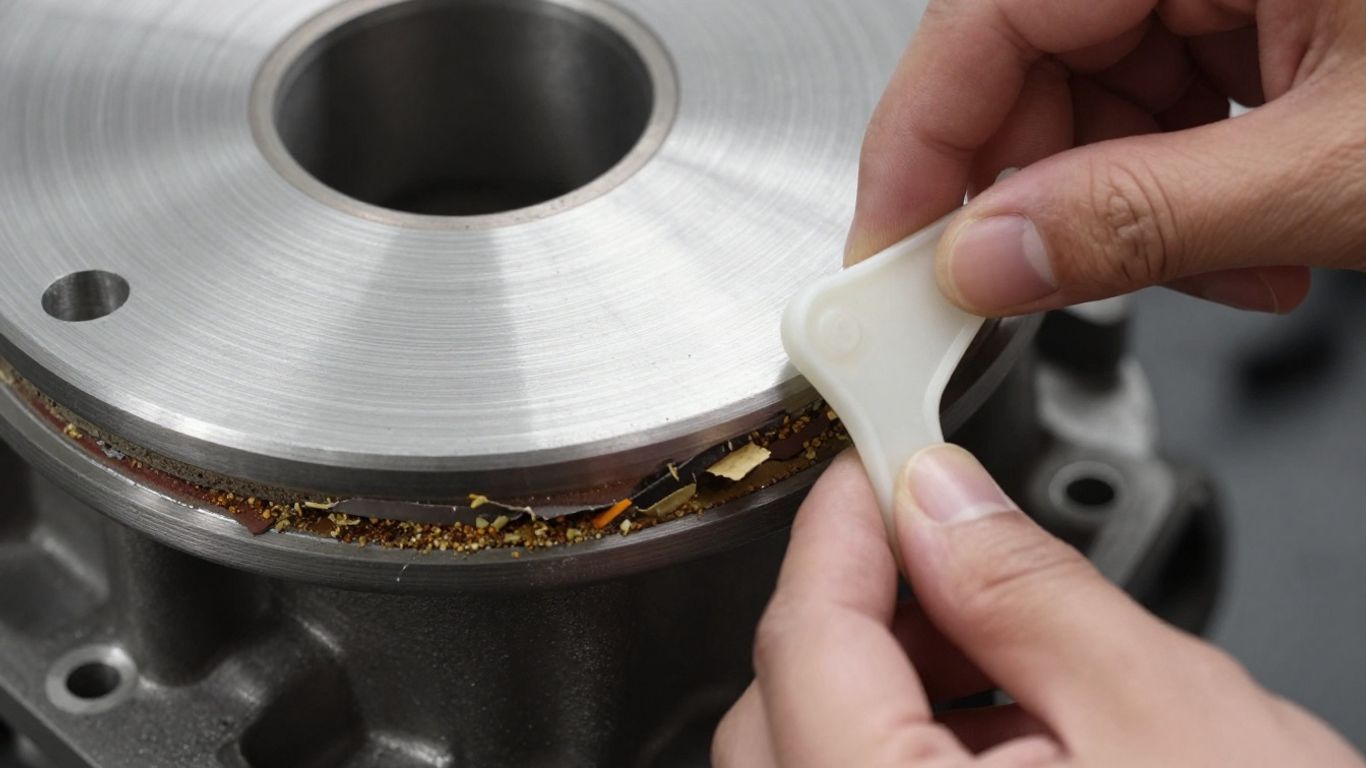
Proper preparation for engine surface cleaning
Before installing any new gasket, every trace of old adhesive must be removed to avoid creating microscopic gaps. Cleaning with a high-grade solvent allows for a smooth, oil-free surface that is critical for a high-quality seal installation.
Applying sealant effectively without over-application
If the manufacturer specifies a liquid gasket maker at junction points, only a minimal amount should be applied. Excessive sealant can break off and contaminate the oil system, potentially blocking pickup screens or damaging internal oil passages.
Bolt tightening sequences and torque specifications
Following a specific cross-pattern sequence is mandatory when tightening bolts on a gasket cover. This ensures the pressure is applied evenly as the component secures into place.
| Bolt Sequence Stage | Torque (Nm) | Purpose |
|---|---|---|
| Hand Tighten | 2 | Seat the gasket |
| Intermediate Pattern | 6 | Compress evenly |
| Final Specification | 10 | Secure housing |
Adhering to these figures is critical to avoid compressing the seal beyond its operational limits or causing the cover to warp under stress.
Testing the repair under pressure
Once reassembled, the engine should be monitored while idling to reach operating tempertures. Watch for any emergence of new leaks around the installation site to verify that the repair is performing exactly as expected under load.
When to consult a professional Land Rover mechanic
Sometimes, the depth of internal access is simply beyond the scope of a standard home garage setup. Certain leaks reside deep within the drivetrain where specific engine-out procedures are necessary for safety. If specialized equipment is required to stabilize the block during parts removal, it is smarter to leave the heavy lifting to Smith’s of London Croydon.
Complexity of engine internal access
Modern engine designs often package components so tightly that entire vehicle sub-sections must be removed to reach a single seal. This level of disassembly creates a heightened probability of damaging fragile electrical connectors or vacuum lines.
Accessing deep leaks in the transmission area
Leaking seals located near the rear of the engine often demand splitting the transmission from the drivetrain. This is a high-stakes procedure that requires accurate alignment tools to prevent severe mechanical misalignment upon reinstallation.
Risks of improper bolt torque on aluminum engine blocks
Aluminum alloys are notoriously soft, making them prone to stripped threads if over-torqued. Professionals use calibrated equipment to ensure they stay within narrow tolerance windows that a generalist might overlook.
Guaranteeing work with certified parts
Using high-quality factory-approved components provides peace of mind that the parts meet original cooling and expansion standards. Repairing a leak with inferior parts usually guarantees that you will be performing the same repair again much sooner than expected.
Preventive maintenance to avoid future oil leaks
Staying proactive is the best defense against long-term engine wear. Rather than waiting for a drip to form on your driveway, regular monitoring can help you detect signs of drying seals before they become problematic. A consistent routine keeps the engine environment clean and functional.
Routine oil changes and high-quality oil filters
Frequent oil changes prevent the accumulation of sludge, which can degrade gaskets from the inside out over time. Using the correct, high-quality filters ensures that pressure is regulated properly, reducing stress on the most vulnerable seals.
Monitoring engine operating temperatures
Heat is the enemy of every seal in the engine. Keep an eye on your gauges, as persistent overheating can quickly accelerate the hardening of rubber compounds, leading to widespread leaking across multiple areas.
Inspecting plastic and rubber components for rot
During routine service, inspect engine hoses and plastic breathers for signs of cracking. These components often sit close to heat sources and can crack, causing oil vapors to vent and create messy buildup that obscures other, more serious leak points.
Benefits of scheduled professional inspections
Annual inspections allow an expert to look in the places you might miss. An early alert regarding a damp seal can save you hundreds of dollars compared to the cost of fixing a major, neglected oil loss issue.
Conclusion
Addressing Land Rover oil leak repair requires a blend of mechanical patience, the right tools, and an understanding of your specific engine architecture. While some minor maintenance can be handled domestically, the complexity of modern sealing systems means many drivers are best served by a dedicated specialist who can plan a comprehensive repair. By focusing on early diagnosis and maintaining high-quality standards, you ensure your vehicle remains reliable for years to come.
Frequently Asked Questions
Is it safe to drive with a small oil leak?
A minor seep might seem manageable, but even small leaks can drip onto hot exhaust parts or rubber belts, potentially causing fire hazards or secondary mechanical failures if left unmonitored.
How often should I check for oil leaks?
It is beneficial to inspect the area under your vehicle after every oil change interval, or roughly every 5,000 to 7,500 miles, specifically looking for new wet spots or dust accumulation.
Why does oil leak from the valve cover so often?
The valve cover sits at the highest point of the engine and experiences significant heat cycles that bake the rubber gasket, eventually causing it to lose its ability to compress and seal.
Can I use sealant on all gaskets?
No, sealant should only be used where the manufacturer explicitly calls for it. Applying it to every gasket can actually prevent the seal from seating correctly and lead to an even worse leak.
What does a burning oil smell indicate?
This scent typically means that oil is leaking from the upper portion of the engine and falling onto a hot component like the exhaust manifold, where it burns off immediately.
How do mechanics know which leak is the source?
Professionals use visual inspection, UV dye additives, and smoke pressure testing to isolate the point of origin, ensuring they don’t waste time fixing parts that aren’t actually leaking.
Why are repairs for oil leaks so expensive?
Many leaks are located in cramped, buried positions that require removing heavy components like the subframe or transmission just to gain physical access, which accounts for most of the labor cost.