

Key Takeaways
A 4×4 system that refuses to engage can have a mechanical, electrical, or control-related cause. A careful diagnosis helps separate a simple operating issue from a fault that could damage the drivetrain.
- Check the selected drive mode and the conditions under which engagement was attempted.
- Inspect tires, leaks, warning messages, battery condition, and visible drivetrain damage.
- Transfer case actuators, shift motors, sensors, wiring, and control modules are common areas to investigate.
- Use a compatible diagnostic scanner before replacing expensive components.
- Stop driving and arrange professional help if there is grinding, severe vibration, fluid loss, or loss of control.
What it means when the Land Rover 4×4 system is not engaging
When the Land Rover 4×4 system not engaging problem appears, the dashboard message alone does not identify the failed part. The vehicle may have rejected a requested mode change, detected inconsistent sensor information, or failed to move a mechanical component. The first useful distinction is whether the system never responds, engages slowly, or reports engagement while the vehicle behaves as if it has not changed modes.
Common warning lights and dashboard messages
A flashing drivetrain or 4×4 indicator often means the requested change is still being attempted or has not been confirmed. A steady warning may indicate that a fault has been stored, while a message about the drivetrain, transmission, or traction system points toward a broader control issue. Record the exact wording, whether the light flashes or stays on, and what the vehicle was doing when it appeared.
Do not assume that a warning light proves the transfer case itself is damaged. A wheel-speed sensor, low system voltage, or communication interruption can prevent the control system from confirming a change. That is why the message should be treated as a clue to investigate rather than a diagnosis.
Differences between high-range and low-range engagement
High-range four-wheel drive and low-range gearing are different requests, even when they use related components. Low range normally requires the vehicle to be stationary or moving very slowly, with the transmission and selector placed in the condition specified for that vehicle. Attempting the change while the drivetrain is loaded can leave the system waiting, refusing the request, or displaying a temporary warning.
If high range works but low range does not, the fault may be limited to the low-range selection process, its position feedback, or the operating procedure. If neither range responds, the investigation should include power supply, controls, actuator movement, and transfer case position rather than focusing on low range alone.
How traction, terrain response, and drivetrain symptoms vary
A traction-related message does not always mean that four-wheel drive has mechanically failed. The vehicle can also react to mismatched wheel speeds, tire differences, or a sensor signal that does not agree with the other drivetrain information. Symptoms may include a flashing selector light, delayed engagement, unexpected traction warnings, or a noticeable change in behavior during turns.
Pay attention to physical symptoms as well. Clicking, grinding, clunks, harsh shuddering, or repeated attempts to shift are more concerning than a single message that clears after a correct mode change. For broader background on common mechanical and electrical reasons a four-wheel-drive system may fail, see this four-wheel-drive troubleshooting guide.
When the problem may be a sensor or communication fault
A sensor or communication problem can make a functioning mechanical system appear unavailable. Wheel-speed sensors, range-position sensors, and control modules exchange information before the system can confirm that a mode change is complete. If one signal is missing or implausible, the vehicle may prevent engagement as a protective response.
Intermittent behavior is a useful clue. A system that works after a restart, fails when the battery is weak, or changes behavior after rain or washing deserves an electrical and communication check. Do not repeatedly cycle the selector while the cause remains unknown; that can create more stored faults without proving anything.
Safety checks before diagnosing the 4×4 system
Before testing the system, put the vehicle on a stable surface and consider the conditions in which the fault occurred. Avoid diagnosing a drivetrain problem by driving farther into mud, steep terrain, or deep water. These basic checks cannot replace a workshop inspection, but they can prevent a simple operating mismatch from becoming a recovery situation.

Confirming the correct drive mode and operating conditions
Read the vehicle instructions for the requested range or terrain mode and follow the stated speed, transmission, and selector requirements. Make sure the selector actually moves to the requested position and that the relevant indicator changes. If the vehicle is stopped on a slope or the driveline is under tension, move only as permitted by the instructions and avoid forcing the controls.
A mode that was selected incorrectly can mimic a failed system. Confirm that the warning appeared during a genuine engagement attempt, not while changing a setting that requires different conditions or a short delay. If the indicator keeps flashing, treat that as incomplete confirmation rather than proof that the system is ready.
Checking tire sizes, pressures, and tread differences
Check that all tires are the correct size and are inflated to the specified pressures. A substantial difference in rolling circumference can make wheel-speed readings disagree and may place extra strain on the drivetrain. Uneven wear, a recently fitted replacement tire, or a temporary spare should be recorded for the technician.
This check is especially useful when the fault appeared after tire work. Compare the actual tires on the vehicle rather than relying only on the information shown by the dashboard. Correcting tire issues may remove one source of conflicting wheel-speed data, although it will not repair a damaged actuator or sensor.
Inspecting for fluid leaks or visible drivetrain damage
With the vehicle safely parked, look for fresh fluid beneath the transmission, transfer case, axles, or driveshaft areas. Also check for hanging shields, damaged connectors, bent components, or signs of an impact. Do not crawl beneath an unsupported vehicle, and do not touch hot drivetrain parts.
Fluid loss and physical damage change the urgency of the diagnosis. A small mark on the ground may be old, but a fresh leak combined with noise or a warning should not be ignored. Photographing the area can help a workshop understand what changed before the vehicle is moved.
Knowing when to stop driving and arrange a tow
Stop driving if the vehicle makes grinding or banging noises, loses drive, vibrates severely, smells of overheated fluid, or shows a rapidly worsening warning. The same applies if it cannot safely move under its own power or if the fault occurs in a hazardous location. Continuing to test a questionable drivetrain on a trail or busy road can turn a contained fault into a larger repair.
If the vehicle remains drivable without unusual noise, use only the distance needed to reach a safe location or workshop. Tell the recovery provider that the issue involves the four-wheel-drive or drivetrain system so the vehicle can be loaded appropriately.
Common causes of a Land Rover 4×4 system not engaging
The causes range from a failed command signal to a component that cannot physically move. Similar symptoms can come from different faults, so replacing the most visible part first is often an expensive gamble. A useful initial diagnosis groups the possibilities into actuation, sensing, power supply, and communication.
Transfer case actuator and shift motor problems
An actuator or shift motor moves the transfer case mechanism between available drive positions. If its motor is worn, seized, contaminated, or unable to complete its travel, the system may click without engaging, remain in its previous mode, or stop with a flashing indicator. The transfer case itself can also have internal wear that prevents the requested position from being reached.
The sound and timing matter, but neither is conclusive on its own. A click may indicate that power reaches a motor that cannot move, while silence may point to a fuse, wiring, control, or command problem. Testing movement and position feedback is more reliable than guessing from sound alone.
Faulty wheel-speed, position, or range sensors
Wheel-speed sensors help the control system compare wheel behavior, while position and range sensors report whether a commanded drivetrain state has actually been reached. A damaged sensor, contaminated tone ring, poor connector, or implausible signal can block engagement even when the mechanical parts are intact.
Sensor faults may be intermittent and may appear alongside traction or stability warnings. The correct approach is to compare stored codes with live readings and inspect the sensor circuit. Clearing the message without correcting the signal usually results in the same warning returning.
Low battery voltage and electrical connection issues
A weak battery or poor ground can cause motors and modules to behave unpredictably. The problem may be most noticeable during a cold start, after the vehicle has sat unused, or when several electrical loads are operating. Loose terminals, corrosion, and water intrusion deserve attention before expensive drivetrain parts are ordered.
Because voltage faults can create multiple unrelated-looking messages, record all warnings rather than focusing on the 4×4 indicator alone. A proper electrical test under load is more useful than a quick glance at the battery terminals. Stable system voltage matters when a motor and its control module must complete a precise shift.
Damaged wiring, fuses, relays, or control modules
A blown fuse, failed relay, broken wire, or damaged connector can interrupt the command path between the controls and the actuator. Harnesses near the underside of the vehicle are exposed to moisture, road debris, heat, and previous repair damage. A control module fault is possible, but it should generally be considered after power, grounds, circuits, and communication have been tested.
Start with the circuit diagram and the vehicle-specific fuse information rather than replacing fuses repeatedly. If a replacement fuse fails again, stop and find the short or overloaded circuit. A careful inspection can save a module from being damaged by an unresolved wiring fault.
How to diagnose the 4×4 system step by step
A methodical diagnosis starts with evidence and moves from simple checks toward component testing. Write down the vehicle model, operating conditions, dashboard wording, noises, and whether the issue is constant or intermittent. This history gives a technician a useful starting point and reduces the chance of replacing parts based only on a symptom.
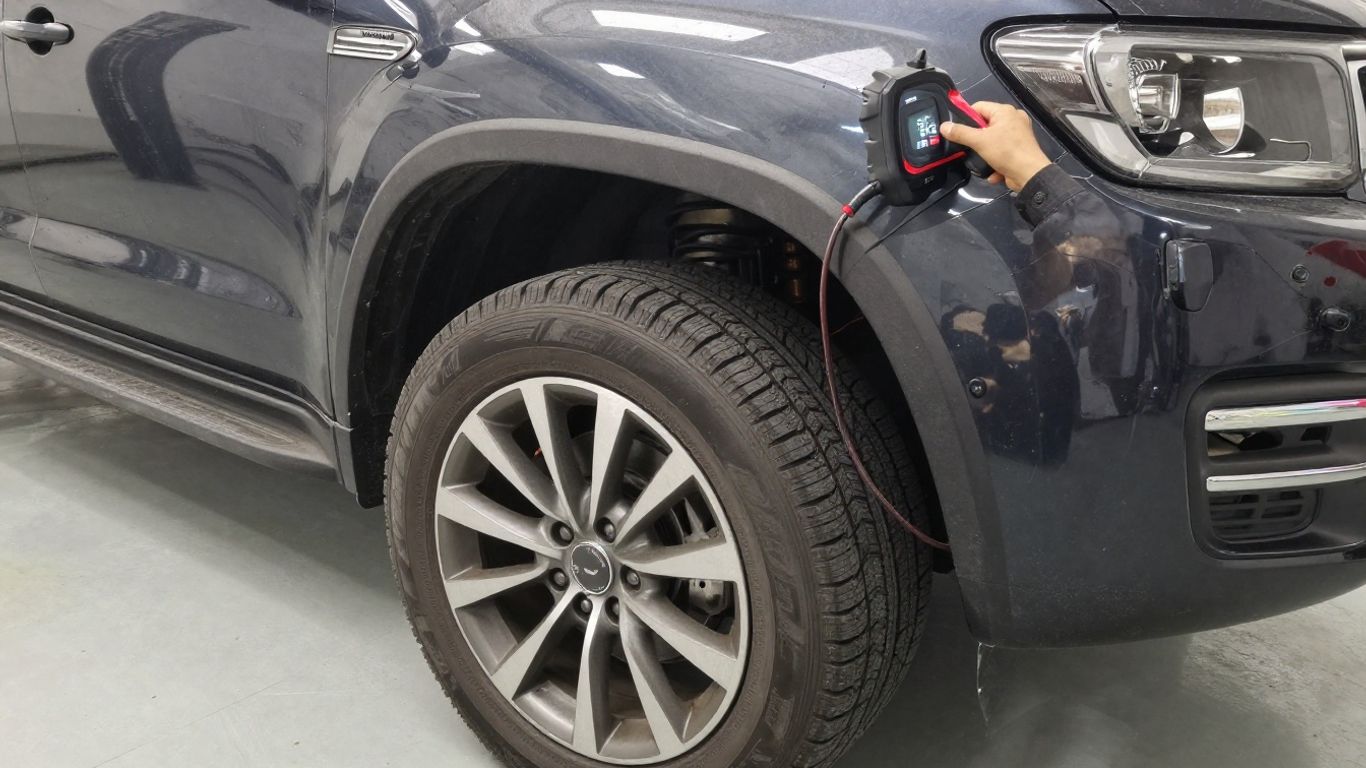
Reading diagnostic trouble codes with a compatible scanner
Use a scanner that can communicate with the relevant drivetrain and chassis modules, not only the basic engine system. Read stored, pending, and manufacturer-specific codes, then save the code details before clearing anything. The code description can identify a circuit or signal, but it does not automatically prove that the named component is defective.
Look for related codes in other modules as well. A communication code, wheel-speed fault, and range-position fault appearing together may point toward a shared power or network issue. For another general reference on flashing indicators, shift motors, low fluid, and electrical faults, review these 4×4 engagement warning signs.
Testing actuator operation and transfer case position
A workshop can command the actuator through a compatible scan tool while observing whether it runs, stops, or stalls. The actual transfer case position must then be compared with the commanded position. If the motor operates but the position does not change, mechanical resistance or internal transfer case damage becomes more plausible.
Do not apply direct power to a motor or bypass safety conditions unless the service procedure specifically permits it. The correct test depends on the vehicle’s wiring, actuator design, and control strategy. Uncontrolled testing can damage the motor or cause an unexpected drivetrain movement.
Checking live data from drivetrain sensors
Live data allows the technician to compare wheel speeds, selector position, range position, voltage, and other available values while the fault is present. The aim is to find a signal that is absent, frozen, implausible, or different from the others. A sensor that looks normal at rest may still fail when the wheel or drivetrain moves.
Interpret the readings together rather than treating one number as decisive. For example, a position signal that changes but never reaches the expected state may suggest incomplete actuator travel, while several modules losing communication may suggest a power or network problem. This is where vehicle-specific service information becomes valuable.
Clearing faults and verifying whether they return
Once a cause has been repaired or corrected, clear the relevant codes only after recording them. Follow the specified drive cycle or engagement test and confirm that the requested range is reached. Then rescan the vehicle to see whether the original code returns immediately, under load, or not at all.
A warning that stays away for one short trip is encouraging but not conclusive. Verify the repair under safe, appropriate conditions and check for new symptoms. If the fault returns, the next step should be a revised diagnosis, not repeated code clearing.
Model and system factors that can change the diagnosis
The exact test sequence depends on the vehicle’s drivetrain design, controls, and model year. A warning that means incomplete selection on one vehicle may mean a broader system fault on another. This is why generic advice should be used to organize the investigation, not to replace vehicle-specific service information.
Differences between full-time 4WD and selectable terrain systems
Some vehicles continuously manage torque distribution, while others provide selectable ranges or terrain settings that alter the control request. The driver may therefore see a traction or terrain message even when the immediate problem is a sensor disagreement or an unconfirmed position. Understanding what the selector is asking the system to do prevents the wrong component from being blamed.
The test should identify the requested state, the confirmed state, and the physical response. If those three do not agree, the fault may be in the command, feedback, or mechanical movement. Avoid assuming that every warning represents a simple two-wheel-drive versus four-wheel-drive switch.
Common considerations for Discovery, Range Rover, and Defender models
Discovery, Range Rover, and Defender vehicles can differ by generation, engine, transmission, transfer case arrangement, and software. Even vehicles with similar dashboard language may use different sensors or diagnostic procedures. Confirm the model year and equipment before interpreting a code or ordering a part.
A model-specific wiring diagram and service procedure can also reveal whether a particular actuator, sensor, or module is monitored directly. The name on the tailgate is not enough to identify the correct repair path. For the Land Rover range, accurate identification is part of the diagnosis, not administrative detail.
How automatic transmission behavior affects engagement
Automatic transmission position and drivetrain load can affect whether a range change is permitted. A selector may need to be in a specified position, and the vehicle may need to be stationary or moving within a narrow limit. If the transmission is holding torque against the drivetrain, a shift can be delayed or refused.
Follow the stated procedure instead of repeatedly shifting between drive and reverse to force engagement. If the vehicle does not respond after the correct sequence, record the conditions and scan for faults. Harsh engagement, slipping, or transmission-related warnings warrant a broader inspection.
Why software updates and calibration may be required
A module may need calibration or a relearn procedure after actuator work, battery interruption, accident repair, or replacement of a related component. Software can also affect how position signals are interpreted and how faults are stored. That does not mean an update is always the answer; it should be considered only when the vehicle-specific repair information supports it.
Calibration should follow the proper scan-tool procedure and be verified afterward. If a mechanical fault remains, software work alone will not make the mechanism move. Ask the workshop what condition the calibration addresses and how the result will be confirmed.
Repair options and ways to prevent repeat failures
The repair should match the failed layer of the system. A connector repair, relearn, or battery replacement may solve the problem when the actuator and transfer case are healthy; a worn motor or damaged internal component needs a different response. Good workmanship includes confirming the original fault and testing the completed repair.
Deciding between recalibration, electrical repair, and part replacement
Recalibration is appropriate when the hardware works and the service procedure calls for a learned position or module setup. Electrical repair is more suitable when testing finds damaged wiring, poor grounds, corrosion, or a failed fuse-related circuit. Part replacement should follow evidence that the component cannot meet its electrical or mechanical test.
A written diagnosis should explain the test result, not just name a suspected part. Ask whether the fault code was present before repair, what was measured, and what verification will be performed afterward. This makes it easier to distinguish a repair from a trial replacement.
When a transfer case motor or actuator needs replacement
Replacement becomes more likely when the motor has failed electrically, cannot complete its travel, or has damaged gearing. It may also be necessary when the actuator position does not agree with the commanded position after power, wiring, and calibration checks pass. The surrounding connector and mounting area should be inspected at the same time.
Installing a new actuator without checking the mechanism can leave the original problem in place. Conversely, condemning the transfer case based only on a flashing light can lead to unnecessary expense. The component should be tested in the context of the entire engagement system.
Choosing dealer, specialist, or independent workshop service
Choose a workshop that has the correct scanner, service information, and experience with electronically controlled four-wheel-drive systems. A dealer may be useful when factory software or model-specific procedures are required. A specialist or independent workshop may be suitable when it can perform the same diagnostic and calibration work with appropriate equipment.
Ask for the diagnostic findings before approving major work. The ability to read drivetrain modules and verify actuator position matters more than a generic claim of four-wheel-drive experience. A clear estimate should separate diagnosis, parts, calibration, and final testing.
Maintenance practices for fluids, tires, and drivetrain components
Use the specified fluids and service intervals for the transmission, transfer case, and axles. Inspect for leaks during routine servicing, keep tire pressures consistent, and replace tires in a way that avoids large rolling-circumference differences. Pay attention to new vibration, clunks, delayed engagement, or changes in selector behavior.
Simple records can help reveal patterns. Note tire replacement dates, battery age, fluid service, warning messages, and the conditions in which the system was used. Preventive care cannot eliminate every electronic or mechanical failure, but it can reduce avoidable strain and make the next diagnosis faster.
A short visual demonstration can help explain the difference between a selector command, actuator movement, and confirmed transfer case position. Use it as background only, since the correct engagement procedure and safety limits remain specific to the vehicle.
Conclusion
A non-engaging 4×4 system deserves a calm, evidence-based diagnosis. Confirm the operating conditions, inspect the basics, scan the relevant modules, and test the actuator and sensor signals before approving major repairs. If the vehicle is noisy, leaking, unstable, or unable to move safely, stop driving and arrange professional recovery.
Frequently Asked Questions
Why is my 4×4 system not engaging?
Common possibilities include an incorrect operating sequence, actuator or transfer case trouble, sensor faults, low battery voltage, damaged wiring, or a control-module communication problem. A compatible scan and physical inspection are needed to separate them.
Can low battery voltage stop four-wheel drive from working?
Yes. Electronically controlled systems may fail to complete a mode change when voltage is weak or connections are poor. Battery and charging-system testing should be part of the diagnosis.
Is a flashing 4×4 light serious?
A flashing light generally means the requested state has not been confirmed or a fault has been detected. Avoid assuming engagement is complete, and check the exact message and stored diagnostic codes.
Can mismatched tires affect 4×4 engagement?
They can create different wheel-speed readings and additional drivetrain strain. Check tire size, pressure, tread depth, and rolling circumference when the problem follows tire replacement or uneven wear.
Should I keep driving if four-wheel drive will not engage?
Only move the vehicle far enough to reach a safe place if it drives normally and has no unusual noise, vibration, smell, or leak. Arrange an inspection promptly, and use a tow when the vehicle is unsafe or unstable.
Does replacing the actuator always fix the problem?
No. The cause may be wiring, power supply, position feedback, internal transfer case damage, or a control issue. The actuator should be tested before and after replacement.
Why might the system need calibration after repair?
Some systems need to learn or confirm actuator and range positions after component replacement, power interruption, or related repairs. Calibration must follow the vehicle-specific procedure and should be verified with a follow-up scan and safe test.