

Key Takeaways
A leaking axle seal deserves attention even when the first sign is only a damp patch. The leak’s location, fluid type, and effect on nearby components help determine the right repair.
- An axle seal keeps differential oil inside the axle housing.
- Oil around a wheel can also come from a hub, swivel, pinion, or brake-fluid leak.
- Low differential fluid may lead to noise and expensive gear damage.
- Diagnosis starts with cleaning the area and tracing fresh fluid.
- A proper repair includes checking the shaft, bearings, breather, and related seals.
What a Land Rover axle seal leak means
An axle seal leak occurs when fluid escapes where the axle shaft passes through the housing or related assembly. The visible oil may travel along the shaft or housing, so the spot on the ground is not always directly below the failed seal. Identifying the source early prevents a small maintenance issue from becoming a wider drivetrain repair.
The axle seal’s role in keeping differential oil contained
The seal forms a flexible barrier around a rotating axle shaft while allowing the shaft to turn. Its job is to keep gear oil in the differential and away from the hub, brake parts, and outside air. When the rubber hardens, tears, or loses contact with the shaft, fluid can begin to seep past it.
A slow leak may look harmless because it leaves only a thin film. Still, any loss of lubricant can reduce the oil level inside the differential, where gears and bearings depend on a proper oil supply.
Common Land Rover models and axle locations affected
The general issue can occur at front or rear axle assemblies, depending on the vehicle’s design and service history. Older four-wheel-drive vehicles may have several nearby sealing points, including axle-shaft seals, hub seals, swivel-housing seals, and pinion seals. Model year and axle configuration matter when selecting parts and planning access.
Before ordering a seal, confirm the vehicle identification details and the exact axle location. A part that fits one assembly may not suit another, even when the vehicles appear similar from outside.
How a seal leak differs from a hub, swivel, or pinion leak
Fluid at the wheel does not prove that the axle seal itself has failed. A hub seal may release lubricant closer to the bearing, while a swivel-housing leak may appear around the steering knuckle. A pinion leak usually begins near the differential input flange and can spread along the housing.
The pattern becomes clearer after the assembly is cleaned and driven briefly. A front axle leak guide can help with early visual clues, but persistent or confusing leaks need a systematic inspection rather than another seal fitted on guesswork.
Why a small leak can become a major drivetrain problem
As oil leaves the differential, the remaining lubricant may no longer reach all the loaded gear and bearing surfaces. Heat and wear can increase, often before the driver notices a dramatic change. A humming or whining sound that rises with road speed is a reason to check the fluid promptly.
The risk is greater when a leak reaches brake components. Even if the drivetrain still feels normal, contaminated friction surfaces can compromise braking and turn a repair into a safety matter.
Symptoms of a leaking axle seal
The symptoms of an axle seal leak vary with how quickly fluid is escaping and where it travels. Some vehicles show a small wet ring, while others leave drops on the driveway. Look at the axle, wheel, and brake area together instead of relying on one sign.
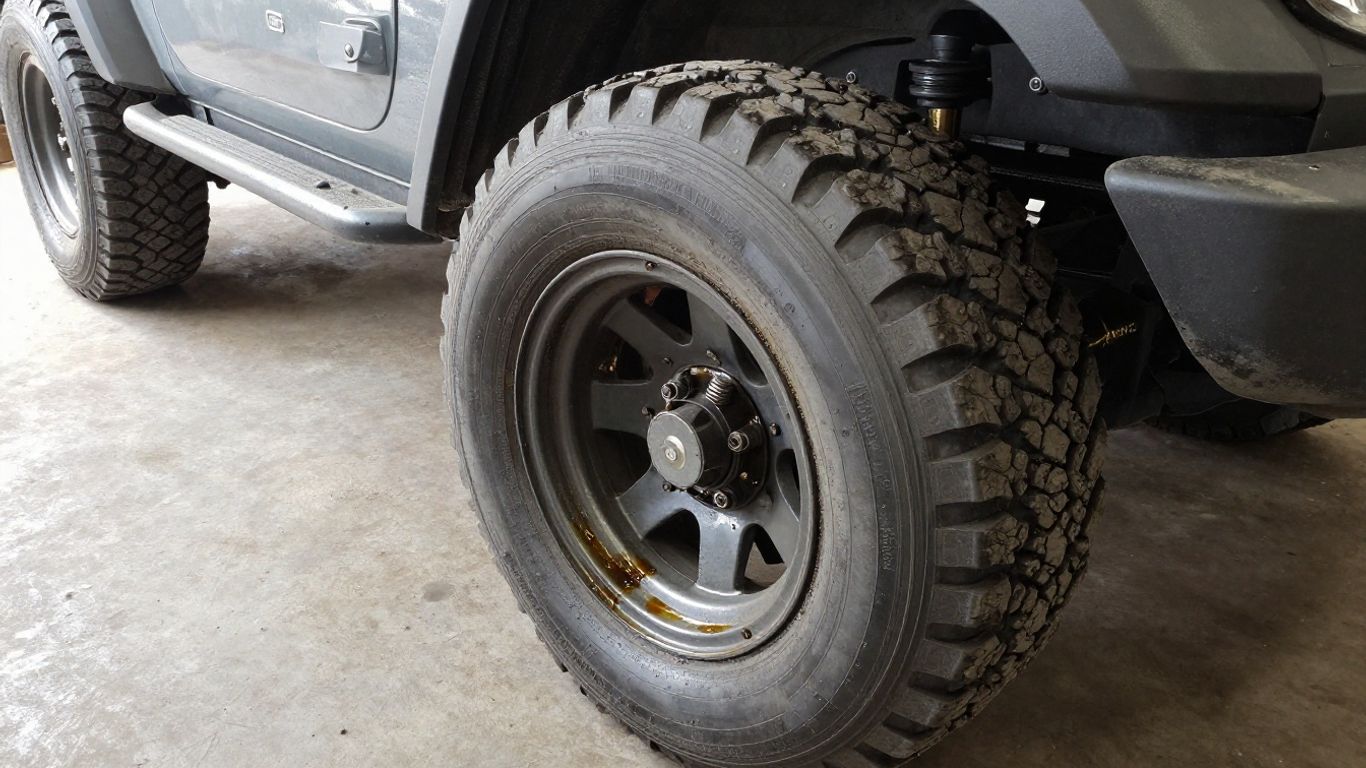
Oil spots near the wheels or axle housing
Dark, thick spots near a wheel or beneath the axle housing are an early clue. Gear oil often has a strong sulfur-like odor and a heavier feel than engine oil, although dirt can change its appearance. A clean sheet of cardboard beneath the vehicle can make a slow overnight drip easier to identify.
Do not assume the leak is at the lowest point of the housing. Fluid can run across castings, brackets, and axle tubes before it falls, masking the original entry point.
Low differential fluid and unusual drivetrain noise
Check the differential level on level ground using the correct procedure for the vehicle. A low level, especially alongside a wet axle area, supports the suspicion of an active leak. Whining, humming, or a change in noise during acceleration and deceleration may indicate that gears or bearings are no longer adequately lubricated.
Noise has other possible causes, so it should not be treated as a diagnosis by itself. It does, however, raise the urgency of checking the oil before driving farther.
Grease or oil buildup around the hub and brake components
A failed seal can leave a wet film on the inner wheel, hub, or nearby suspension parts. Grease-like buildup may also come from a bearing or constant-velocity joint, so texture and smell are useful clues. If the inside of the wheel is coated, inspect the brake rotor or drum area before cleaning anything.
Residue that spreads outward from the axle flange suggests a different path from residue concentrated around a hub bearing. Photographs taken before cleaning can help a technician understand what was found.
Burning smells, slipping brakes, or reduced braking performance
Oil contacting hot brake components can create an unpleasant smell after a drive. More seriously, contamination may reduce friction and cause pulling, grabbing, or a soft change in braking response. Any noticeable reduction in braking performance should be treated as a reason to stop driving and arrange an inspection.
A brake cleaner may remove surface residue, but it does not correct the leak or restore damaged friction material. The brake components must be assessed after the source is repaired.
Changes in four-wheel-drive operation and handling
A seal leak does not always cause an immediate change in four-wheel-drive operation. If lubricant loss progresses, though, noise, vibration, or roughness may develop through the axle and driveline. A vehicle may also feel different if oil reaches a wheel or braking surface.
Pay attention to new sounds after water crossings, trail use, or a long loaded journey. Changes that appear with a leak should be reported together rather than considered separate problems.
How to diagnose the source of the leak
Diagnosis is mainly a process of elimination. Several seals and housings sit close together, and fluid can migrate from one point to another. A careful inspection avoids replacing a seal that was never the source.
Cleaning the axle and tracing fresh fluid
Begin with the vehicle safely supported and the surrounding components cool. Remove accumulated oil and dirt with a suitable cleaner, then allow the area to dry. After a short drive, inspect for the first point where fresh fluid reappears.
A bright inspection light makes a narrow wet line easier to follow. The persistent Discovery 2 leak discussion illustrates why repeated seal replacement without confirming alignment and the leak path can leave the underlying problem unresolved.
Checking differential oil level and fluid condition
Check the level before significant driving, following the vehicle’s service instructions. If the level is low, note how much fluid is needed and whether the oil contains metallic particles, water, or unusual debris. Milky fluid can point to water contamination, while glitter or larger fragments may indicate internal wear.
Replace only the amount needed for testing if a repair is imminent, and use the specified lubricant. Topping up is not a substitute for finding the leak.
Inspecting the axle shaft, hub, swivel housing, and breather
Once the area is clean, inspect each nearby component rather than focusing only on the seal. Look for a polished groove, rust, impact damage, bearing looseness, or oil emerging from a breather. A blocked breather can raise internal pressure and push fluid past an otherwise sound seal.
The inspection should include the seal’s seating surface and the shaft’s running surface. A new seal cannot reliably compensate for a damaged surface or excessive movement.
Identifying gear oil versus grease or brake fluid
Fluid type narrows the search. Gear oil is usually thick and strongly odorous; bearing or joint grease is more opaque and tends to cling in heavier lumps. Brake fluid is generally thinner and may feel slippery without the characteristic gear-oil smell.
The following quick comparison is useful during an initial inspection:
| Fluid or residue | Common appearance | Likely area to inspect | Immediate concern |
|---|---|---|---|
| Gear oil | Dark, thick, strong odor | Axle, differential, pinion | Lubricant loss and gear wear |
| Bearing grease | Heavy, sticky, opaque | Hub or bearing | Bearing condition and seal failure |
| Brake fluid | Thin, slick, pale to amber | Caliper, hose, master-cylinder path | Reduced braking performance |
| Water-contaminated oil | Cloudy or milky | Differential or axle housing | Corrosion and poor lubrication |
This comparison is only a starting point. Old residue can change color, and mixed fluids can make identification difficult, so the location of fresh fluid remains decisive.
When a professional inspection is necessary
Seek professional help when the leak returns after a seal replacement, the axle shaft appears grooved, or the bearing has noticeable play. Specialized tools may be needed to remove the hub, measure surfaces, set preload, or inspect internal components. Stop driving if the brake is contaminated, the differential is nearly empty, or the noise is worsening.
A precise diagnosis often costs less than several unsuccessful parts changes. It also reduces the chance of damaging a new seal during installation.
Common causes of Land Rover axle seal leaks
Seal failure is often the visible result of another condition. Age, heat, dirt, shaft wear, pressure, and installation errors can all contribute. Finding the cause matters because replacing the rubber alone may provide only a temporary fix.
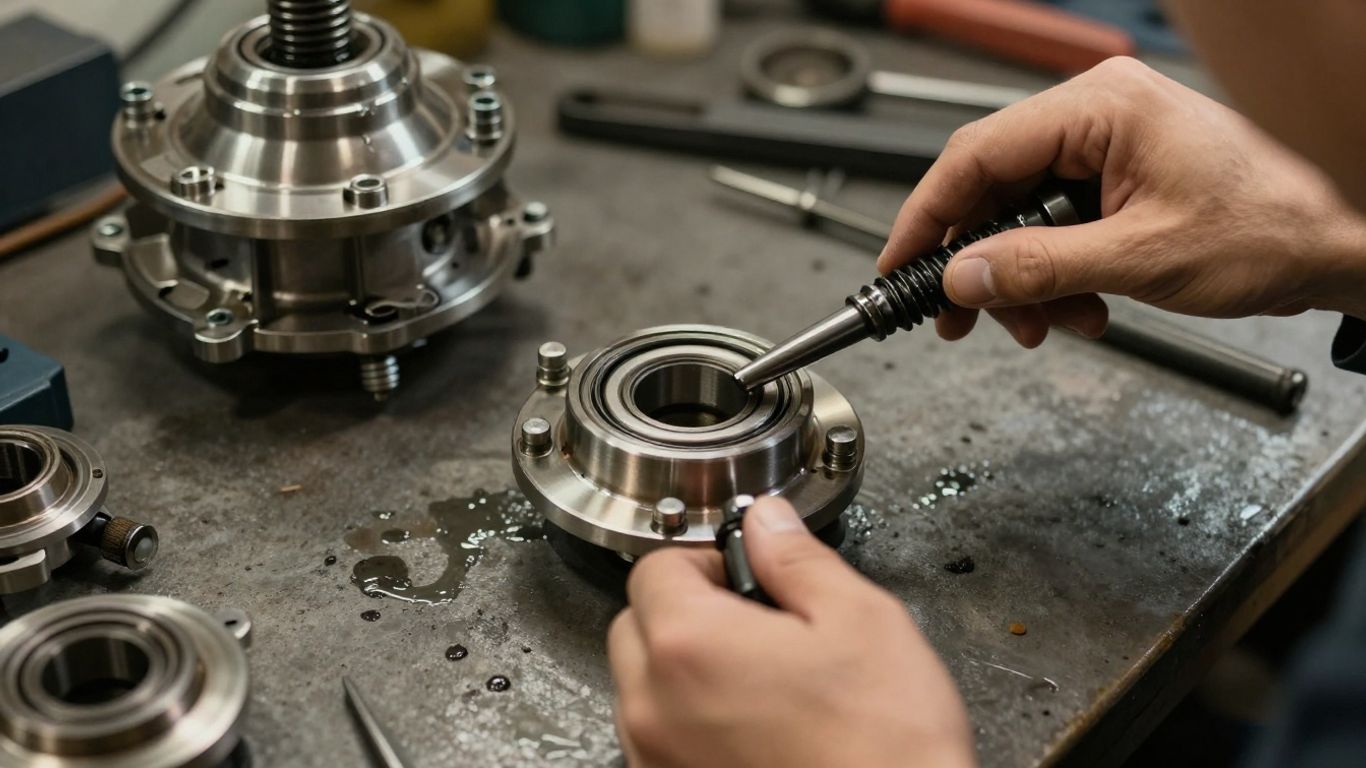
Worn, hardened, or damaged axle seals
Rubber seals lose flexibility with age and temperature cycles. The sealing lip may become brittle, cut, or distorted, especially if dirt has worked into the contact area. A seal can also be damaged while being driven into a housing at an angle.
The correct part and orientation matter. Even a high-quality replacement will leak if it is the wrong size, seated unevenly, or installed over a dirty surface.
Corrosion, grooves, or scoring on the axle shaft
The seal lip rides on a small section of the rotating shaft. Rust, pitting, or a worn groove at that contact point can provide a path for oil to escape. Deep scoring may require shaft repair or replacement rather than another seal.
Measure and inspect the surface carefully. The Discovery 2 hub-seal troubleshooting notes show why the relationship between the seal and shaft dimensions deserves attention when repeated replacements fail.
Excessive bearing play or worn hub components
A loose or worn bearing can allow the shaft or hub to move beyond the seal’s normal range. That movement flexes the sealing lip and may quickly damage a new part. Roughness, looseness, or abnormal noise during inspection should therefore be addressed alongside the leak.
Replacing the seal alone makes little sense when the supporting bearing is no longer stable. The repair should restore the alignment and movement the seal was designed to handle.
Blocked axle breathers and pressure buildup
Axle breathers allow pressure to equalize as the lubricant heats and cools. Mud, rust, or hardened debris can obstruct the passage. Pressure then seeks another route, commonly through a seal or gasket.
Inspect the breather and its hose where fitted, particularly after muddy or dusty driving. Clearing the breather may prevent a repeat leak, but it does not repair a seal that has already been damaged.
Incorrect installation, fluid level, or off-road damage
A seal may fail early if it is driven in too far, installed crooked, or fitted with a damaged lip. Overfilling can also encourage leakage, while water crossings and impacts can damage housings, shafts, or protective parts. Previous repairs may leave burrs or misalignment that are not obvious at first glance.
The repair history is useful evidence. If the same location leaks repeatedly, inspect the shaft, housing bore, bearing condition, and breather before fitting another replacement.
How an axle seal is repaired or replaced
The exact procedure depends on the axle design, but the repair is more than simply pulling out old rubber and pressing in new rubber. The vehicle must be secured, the source confirmed, and the surrounding parts inspected. Clean work is essential because grit can damage the new seal immediately.
Preparing the vehicle and confirming the correct replacement parts
Park on a stable, level surface and secure the vehicle according to safe lifting practice. Confirm the axle position, seal dimensions, associated gaskets, lubricant specification, and any one-time-use hardware before disassembly. Have containers ready for drained oil and protect exposed brake parts from contamination.
Good preparation prevents a stalled repair and reduces the temptation to reuse a damaged seal or install an uncertain substitute. It also gives the technician a chance to compare the new part with the old one before work begins.
Removing the wheel, brake components, and hub assembly
The wheel and brake components are removed in a controlled sequence, with calipers supported rather than left hanging by their hoses. The hub and axle shaft then come apart according to the vehicle’s service procedure. Some assemblies require additional support or special tools because of their weight and fit.
Keep fasteners and spacers organized as they are removed. Their position can affect bearing adjustment, hub alignment, and final end play.
Inspecting bearings, axle surfaces, and related seals
With access available, inspect the bearing for roughness, heat discoloration, looseness, and contamination. Examine the shaft where the seal lip runs and check the housing bore for scratches or distortion. Also inspect nearby seals and the breather so the repair addresses contributing faults.
This is where the real cause matters. If the shaft is damaged or the bearing has play, installing a new seal without correcting those conditions is likely to produce another leak.
Installing the new seal without damaging its lip
Clean the bore and shaft, lubricate the sealing lip with the appropriate fluid, and use a suitable driver that applies pressure evenly to the seal’s strong outer edge. Keep the part square as it enters the housing. Avoid prying against the lip or allowing a dry shaft to tear it during assembly.
Follow the specified depth and orientation rather than copying a position by eye. A seal installed too shallow, too deep, or backward may leak from the first drive.
Refilling the differential and checking for leaks
Reassemble the hub and brake components, then refill the differential with the specified lubricant to the correct level. Clean the outside of the axle again so any later wetness is easy to identify. After a short road test, inspect the seal area, hub, and brake components for fresh fluid.
The final check should include unusual noise, brake feel, fastener security, and fluid level. A dry exterior after testing is encouraging, but a follow-up inspection is still worthwhile.
Repair costs, risks, and maintenance
The price of an axle seal repair depends less on the seal itself than on access and the condition of the parts around it. A straightforward replacement may be relatively contained, while a damaged shaft, worn bearing, contaminated brakes, or seized hardware can expand the job. A written estimate should identify what was found, not just list a seal.
Typical parts and labor factors that affect repair costs
Labor varies with axle layout, rust, hub access, and whether the vehicle needs special tools or adjustments. Parts may include the seal, lubricant, gaskets, bearing hardware, and brake-cleaning or replacement components. Diagnostic time is also a legitimate part of the repair when several nearby leak sources are possible.
Ask whether the estimate includes cleaning, inspection, fluid replacement, and a post-repair leak check. These steps help distinguish a complete repair from a quick parts change.
When replacing bearings or related seals makes sense
A bearing with play, roughness, heat damage, or contamination should be replaced while the hub is already apart. Related seals may also be sensible when they are old, disturbed during disassembly, or clearly damp. Replacing sound parts unnecessarily is not ideal, but ignoring a failed supporting component can waste the labor just spent reaching it.
The decision should follow inspection results and the vehicle’s service needs. A technician should explain which part is defective and why replacement is recommended.
Dangers of driving with a leaking axle seal
Driving can spread oil onto brakes and lower the differential level further. Continued operation with a whining axle may turn surface wear into damaged gears or bearings. A slow leak can become faster when the lubricant heats, during highway travel, or after rough terrain.
If the vehicle is leaving drops, showing brake contamination, or making new drivetrain noise, limit use until it has been checked. Topping up fluid may reduce immediate risk but does not make the vehicle safe indefinitely.
Recommended fluid checks after off-road driving
Water, mud, and impacts can affect axle breathers, seals, and housings. After demanding off-road use, inspect for fresh wetness, damaged guards, loose components, and changes in fluid appearance. Check the differential level if a water crossing was deep or the axle was submerged.
A simple post-trip routine can catch trouble before the next journey:
- Wash heavy mud from the axle and hub areas.
- Look for fresh oil around seals, flanges, and breathers.
- Check for dents, cracks, or displaced protective components.
- Listen for new humming, grinding, or vibration on the next drive.
These checks take little time and create a useful record of changes. They are especially helpful when a leak is slow enough to hide beneath accumulated dirt.
Preventive maintenance for Land Rover axle assemblies
Use the correct lubricant and service intervals, keep breathers clear, and address unusual noise or bearing play early. During routine inspections, look behind the wheels and along the axle housing rather than checking only the engine bay. After any seal work, return for a short follow-up inspection to confirm that the area remains dry.
Preventive care cannot eliminate wear, but it can limit the time a leak goes unnoticed. It also makes the next diagnosis faster because the axle is clean and its recent condition is known.
Conclusion
A Land Rover axle seal leak is easiest to manage when the source is confirmed before parts are changed. Cleaning the assembly, checking fluid level, inspecting shaft and bearing condition, and protecting the brakes from contamination turn a vague drip into a clear repair plan.
Frequently Asked Questions
Can I drive with an axle seal leak?
Only for the shortest necessary trip to a repair facility, and not if the leak is heavy, the differential is low, braking is affected, or new drivetrain noise is present. A small leak can worsen without much warning.
What does axle gear oil usually smell like?
Gear oil commonly has a strong sulfur-like odor and a thick consistency. Smell alone is not conclusive, because old dirt and mixed fluids can alter what you notice.
Is oil inside the wheel always an axle seal problem?
No. Oil or grease inside a wheel can come from a hub seal, bearing, swivel housing, pinion, or another nearby component. Cleaning and tracing fresh fluid is the reliable way to separate these possibilities.
How long does an axle seal replacement take?
The time varies with the axle design, access, corrosion, and the condition of bearings and shafts. A simple repair may be completed in one visit, while damaged supporting parts require additional work.
Should the differential fluid be changed after a seal repair?
Usually the lost fluid should be replaced with the specified lubricant, and a full change may be appropriate if the oil is contaminated or its condition is uncertain. The final level must be checked correctly.
Can a blocked breather cause a seal to leak?
Yes. A blocked breather can allow pressure to build as the axle lubricant heats, encouraging fluid past a seal or gasket. Clearing the breather does not replace a seal that is already damaged.
What should I inspect after the repair?
Check for fresh fluid around the seal and hub, confirm the differential level, and watch for brake contamination, new noise, vibration, or changes in braking. A follow-up inspection after a short drive is good practice.