

Key Takeaways
A failed compressor is often the result of another fault, especially an air leak that has made the pump work too hard. A careful diagnosis helps avoid replacing an expensive part unnecessarily.
- Slow lifting, unusual compressor noise, and suspension warnings are common signs.
- Leaking air springs, worn compressor parts, moisture, relays, and wiring can all be involved.
- Fault codes should be read alongside pressure, voltage, leak, and ride-height checks.
- The correct repair may involve a compressor, air dryer, relay, leak repair, or calibration.
- Continuing to drive with suspension warnings can turn a manageable fault into a larger repair.
How the Land Rover air suspension system works
Air suspension replaces conventional steel springs with air-filled springs whose pressure can be adjusted. A compressor supplies air, while valves direct it to the appropriate corner and sensors report the vehicle’s height. The control system compares actual height with the selected setting and makes corrections as needed. Understanding that relationship is the first step in diagnosing Land Rover air suspension compressor failure.
The compressor’s role in ride-height control
The compressor draws in air and pressurises it so the suspension can raise the vehicle. It does not decide the ride height by itself; the suspension control system commands it when additional pressure is needed. If the compressor cannot build pressure quickly enough, the vehicle may remain low or take an unusually long time to lift.
A pump that runs longer than normal deserves attention even if the vehicle eventually reaches its target height. Early investigation can prevent heat damage and reduce the chance of being left with a vehicle that cannot maintain a safe driving height.
Air springs, valves, sensors, and the reservoir
The compressor works with air springs at the wheels, a valve block, height sensors, air lines, and, on many systems, a reservoir. The springs support the vehicle, the valves control airflow, and the sensors measure the position of the body relative to the suspension. A leak or restriction anywhere in that chain can look like a compressor problem.
The reservoir allows air to be stored so height changes can happen without running the compressor continuously. When pressure is lost, however, the system may call for repeated compressor operation and gradually expose weaknesses in the pump or dryer.
How the control module manages suspension height
The control module receives signals from the height sensors and compares them with the requested ride height. It then operates the compressor and valves in a sequence intended to raise, lower, or level the vehicle. Fault information may be stored when pressure rises too slowly, a sensor reading is implausible, or a requested height cannot be reached.
A generic engine-code reader may not access suspension faults on every vehicle. A suitable vehicle-specific scan tool is therefore useful, particularly when the dashboard message is broad and several components could produce the same symptom.
Why compressor performance affects the entire system
The compressor is only one part of the system, but its performance affects every height adjustment. Poor output can leave the suspension low, while excessive run time can overheat the motor and wear its internal parts. A replacement pump installed without finding the original cause may fail again.
For background on symptoms and faults across different models, this model-specific fault guide can help frame the initial inspection. It should supplement, not replace, measurements taken from the vehicle itself.
Common symptoms of Land Rover air suspension compressor failure
A compressor rarely fails without giving some warning. The first clues may be a slower height change, a harsher mechanical sound, or a message that limits available suspension settings. These signs are not conclusive on their own, because leaks, sensors, electrical faults, and valve problems can create similar behaviour.
The pattern matters more than any single symptom. Note when the problem occurs, whether one corner drops, how long the compressor runs, and whether the vehicle recovers after being switched off and restarted.

Slow lifting or failure to reach normal ride height
A healthy system should raise the vehicle within a predictable period under normal conditions. A noticeably delayed lift suggests insufficient compressor output, low reservoir pressure, a leak, or a restriction in the air supply. Failure to reach normal height is more serious than a minor delay because it may leave limited clearance and altered handling.
Avoid repeatedly commanding height changes while diagnosing the issue. Each cycle can add heat and operating time to a compressor that is already struggling.
Compressor noise, overheating, or repeated cycling
A compressor that becomes louder, rougher, or more persistent than usual may have worn internal components or may be compensating for lost air. Repeated cycling after the vehicle is parked is another useful clue. Heat buildup can trigger a protective shutdown, which may make an intermittent problem appear electrical.
Let the system cool before making repeated tests. A technician can compare operating sound, current draw, pressure rise, and duty cycle rather than judging the pump by noise alone.
Suspension warning messages and dashboard lights
A suspension warning indicates that the control system has detected a condition outside its expected range. It does not prove that the compressor itself has failed. Pressure faults, sensor readings, valve operation, wiring, and stored communication errors all need to be considered.
Record the exact wording and any changes in available height modes. A message such as normal height only or special programs unavailable can help direct the diagnostic process, but it still needs to be confirmed with codes and physical tests.
A vehicle that lowers overnight or sits unevenly
If one corner is lower after the vehicle has been parked, suspect a leak at that corner, its air spring, line, or valve path. If the whole vehicle settles, the reservoir, valve block, or several leaks may be involved. The compressor may be functioning but running repeatedly to restore pressure.
Uneven height is particularly useful evidence because a compressor supplies the system as a whole, while a single low corner often points toward a local air-loss problem. Check the vehicle on level ground and compare it at the same time of day.
Limp-home mode and restricted driving height
The control system may restrict height settings when it cannot confirm safe operation. The vehicle can feel different when it remains at a fixed or reduced height, and ground clearance may be compromised. Driving should be limited until the cause is known, especially if the vehicle is low, leaning, or showing multiple warnings.
Do not treat a reset as a repair. Clearing a message may temporarily restore a function while the underlying pressure, leak, or electrical fault remains.
What causes compressor failure
Compressor failure is often the final stage of a longer problem rather than an isolated event. Air loss, moisture, contamination, mechanical wear, and poor electrical supply can all increase the load on the pump. Identifying the initiating fault is essential if a replacement is to last.
The same symptom can have several causes, so parts should not be ordered solely from a dashboard message. A structured inspection is usually cheaper than replacing the compressor and discovering that an air spring or relay caused the original overload.
Air leaks that force the compressor to overwork
A small leak may be difficult to hear, especially in a noisy workshop or when the vehicle is already low. The compressor then replaces lost air again and again, often operating for longer periods than intended. Over time, that extra duty can damage the pump and its dryer.
Inspect air springs, fittings, lines, and valve connections at different suspension positions. A leak that appears only when a spring is flexed may be missed during a quick visual check.
Worn pistons, seals, and internal compressor components
Compressors contain moving parts and seals that wear with age and operating time. As sealing efficiency falls, the pump may take longer to produce pressure, run hotter, and draw more current. A worn unit may still operate, which is why a vehicle can show gradual symptoms before complete failure.
Pressure-rise testing and current measurements provide stronger evidence than sound alone. If output is poor despite a sound air supply and correct electrical command, internal wear becomes more likely.
Moisture, corrosion, and contaminated air-dryer material
The air dryer helps reduce moisture entering the system. Saturated or deteriorated dryer material can allow moisture and contamination to circulate, contributing to corrosion and sticking valves. Water exposure and humid conditions can make those problems develop faster, particularly where connectors and housings are poorly protected.
The dryer should be assessed whenever the compressor is replaced or rebuilt. Ignoring it can leave the new unit working against the same contaminated conditions.
Faulty height sensors or compressor relays
A height sensor that reports an incorrect position may cause unnecessary corrections or prevent the system from accepting a valid height. A relay with burnt contacts may provide intermittent power, excessive resistance, or no power at all. Both faults can be mistaken for a dead compressor.
Compare sensor readings with the physical position of the vehicle and test relay operation under load. Swapping parts without those checks can hide the real fault and create a second problem.
Electrical problems and damaged wiring
Low battery voltage, poor grounds, corroded connectors, and damaged wiring can stop a compressor from starting or reduce its performance. Voltage may look acceptable with no load but fall when the motor is commanded on. Wiring near the compressor and suspension components deserves close inspection.
A charging-system check is useful before condemning the pump. Electrical repairs may be simpler and less expensive than mechanical replacement, but only if the circuit is tested methodically.
How to diagnose the problem accurately
Good diagnosis combines electronic information with physical checks. Start by confirming the vehicle’s exact suspension configuration, then record symptoms before clearing any codes. The goal is to establish whether the compressor is failing to run, failing to build pressure, or being commanded too often because another component is losing air.
A measured approach also protects the replacement budget. The following suspension troubleshooting discussion illustrates why a non-running compressor should be checked alongside fuses, pressure faults, and stored codes rather than assumed to be mechanically failed.
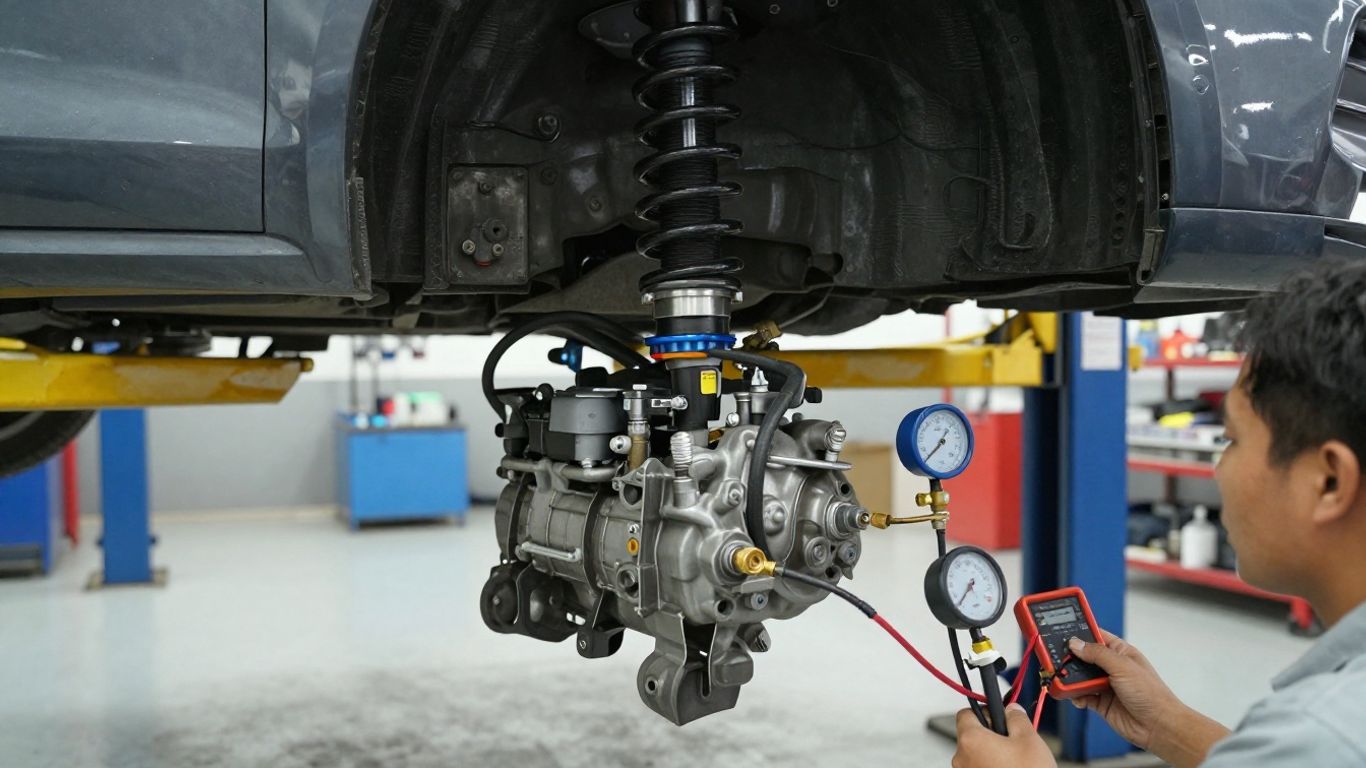
Checking fault codes with a suitable scan tool
Read the suspension control module with a scan tool that supports the vehicle, not only the engine computer. Record codes and freeze-frame information before clearing anything. Codes can point toward pressure build-up, sensor plausibility, communication, or voltage problems, but they must be interpreted with the vehicle’s symptoms.
A code is evidence, not a parts order. Confirm whether the fault returns after a controlled test and whether the related component behaves as described by the diagnostic data.
Testing compressor operation and system pressure
First establish whether the compressor receives a command and electrical supply. If it runs, measure how quickly pressure rises and whether it reaches the required level. Slow pressure increase may indicate internal wear, a leak, a blocked intake, or a faulty dryer rather than one definite cause.
Pressure testing should be done with appropriate equipment and safe procedures. Do not place yourself beneath a vehicle supported only by air suspension; use proper mechanical support before inspecting underneath.
Inspecting air springs, lines, fittings, and valves for leaks
Leak testing should cover the air springs, unions, lines, reservoir, valve block, and compressor connections. Soapy solution can reveal bubbles at accessible joints, while overnight height comparison can expose slow loss. The inspection should account for leaks that appear only when the suspension moves.
Repair the leak before judging the compressor’s long-term condition. A pump that has been forced to run for months may have both a leak-related cause and separate heat or wear damage.
Evaluating the relay, fuse, wiring, and battery voltage
Check the fuse rating and condition, then verify voltage at the compressor connector during an actual command. Inspect grounds, relay contacts, terminals, and wiring for corrosion or heat damage. Battery voltage and alternator output should also be checked under realistic electrical load.
A healthy fuse does not prove that the circuit is healthy. Resistance in a connector or relay can prevent the motor from receiving the current it needs even when static voltage appears normal.
Distinguishing compressor failure from control-system faults
A compressor can be mechanically sound but never receive the correct command. Conversely, it can receive power and run while failing to produce pressure. Comparing scan data, command signals, pressure response, sensor readings, and leak-test results helps separate those situations.
Use the evidence to classify the fault before selecting parts. This simple table is useful as a starting framework, although each vehicle still requires model-appropriate testing.
| Observation | More likely area to investigate | Useful confirmation |
|---|---|---|
| Compressor is silent | Fuse, relay, wiring, command, or motor | Loaded voltage and scan data |
| Compressor runs but pressure rises slowly | Internal wear, dryer, restriction, or leak | Pressure-rise and leak tests |
| One corner drops overnight | Air spring, line, fitting, or valve path | Height comparison and bubble test |
| Warning returns after reset | Stored system fault remains active | Module codes and repeat test |
The table is not a substitute for diagnosis, but it helps prevent a common mistake: treating every suspension warning as proof that the compressor must be replaced.
Land Rover model-specific failure patterns
Air suspension layouts and component revisions vary between model lines and production years. The same warning can therefore have different common causes depending on the vehicle’s age, engine bay layout, compressor location, and control software. Confirm the model, build details, and suspension equipment before ordering parts.
The broad patterns below are useful for organising an inspection, not for predicting a failure with certainty. Vehicle history remains more valuable than a model stereotype.
Common issues on the Range Rover
Range Rover vehicles with air suspension can show slow height changes, overnight settling, compressor noise, or restricted height modes when the system cannot maintain pressure. Older vehicles may also have aged air springs, lines, relays, or valve components that place extra demand on the compressor.
Look for the sequence of events. A vehicle that gradually began running longer may have a leak or worn pump, while a sudden no-operation condition deserves an electrical and control-command check first.
Typical compressor problems on the Range Rover Sport
Range Rover Sport faults can likewise involve compressor output, air leaks, sensors, valves, or electrical supply. A compressor that runs repeatedly may be responding to pressure loss rather than causing it. Uneven settling should make local air-spring and line inspection a priority.
The exact compressor and related parts can differ across generations. Match replacements to the vehicle identification details rather than relying on a generic model description.
Air suspension faults on the Discovery and LR3
Discovery and LR3 vehicles may display restricted-height or special-program warnings when pressure cannot be built or a control-system reading is implausible. A non-running compressor can result from a relay, fuse, wiring, command, or motor fault. A running compressor that cannot fill the reservoir points toward a different group of tests.
Read the suspension module and inspect the air supply before assuming the compressor is beyond repair. The warning message describes the system’s condition, not necessarily the failed component.
Differences between older and newer suspension systems
Older and newer systems can use different compressors, dryers, connectors, sensors, software strategies, and diagnostic procedures. Parts that look similar may have different electrical or pressure specifications. Even within one model line, a mid-cycle revision can change compatibility.
This is why the vehicle identification number, build date, and installed part number matter. They reduce the risk of fitting a component that physically installs but does not operate correctly with the control system.
Why mileage, climate, and service history matter
Mileage provides a rough indication of accumulated operating time, but it is not a diagnosis. Climate, road salt, dust, water exposure, storage conditions, load, and previous repairs all affect component life. A vehicle used on short trips with a slow leak may work its compressor harder than a higher-mileage vehicle with a well-maintained system.
Service records can reveal whether a compressor, air dryer, air spring, relay, or leak has already been addressed. That history helps distinguish a first failure from a recurring root cause.
Repair and replacement options
The right repair depends on what testing finds. Some compressors can be rebuilt, while others are more practical to replace; a leak or electrical fault may need attention before either option is considered. The objective is to restore the complete system, not simply make the warning disappear.
Part quality, correct specification, and installation procedure all matter. Obtain the exact vehicle details before comparing options, and treat unusually cheap parts with caution if their output, warranty, or compatibility is unclear.
When a compressor rebuild may be practical
A rebuild may make sense when the housing and motor are serviceable and replacement wear components are available. It can address worn seals, piston components, or dryer material, depending on the compressor design. A rebuild is not suitable if the motor, cylinder, housing, or electrical section has severe damage.
The unit should be assessed rather than rebuilt by assumption. A professional inspection can determine whether the cost and expected service life justify repair compared with replacement.
Choosing between an original-equipment and aftermarket compressor
An original-equipment unit is designed for the vehicle’s intended electrical and pressure requirements. A reputable aftermarket unit may also be suitable when its specifications, fitment, warranty, and support are clear. The cheapest listing is not necessarily the lowest-cost repair if it fails early or requires additional changes.
Compare the full package, including the dryer, relay recommendations, seals, warranty terms, and calibration requirements. Compatibility should be verified by part number and vehicle details.
Replacing the air dryer, relay, and related components
A compressor replacement is often an opportunity to replace or inspect the dryer and relay. The dryer protects air quality, while the relay controls a high-current motor circuit that may have suffered from prolonged operation. Damaged connectors, filters, and intake components should also be addressed.
Replacing related parts is not automatic proof that they failed. Their condition should be tied to the test results and the reason the original compressor became overloaded.
Repairing leaks before installing a replacement compressor
Any confirmed leak should be repaired before the new compressor is put into service. Otherwise, the replacement may immediately inherit the same excessive duty cycle that damaged the old unit. Check the repaired system again after it reaches normal height and after it has been parked.
This step is especially important when a vehicle has been sitting low overnight. A new compressor can restore height temporarily while the leak continues unnoticed.
Calibrating ride height after completing the repair
Some systems require ride-height calibration after suspension work or component replacement. Calibration allows the control module to associate sensor readings with the correct physical height. The procedure should use suitable equipment and a level surface, with the vehicle unloaded unless the instructions specify otherwise.
After calibration, confirm each height setting, inspect for leaks, and road-test carefully. A successful repair should include stable height and normal compressor operation, not merely the absence of a warning light.
How to prevent another compressor failure
Prevention begins with finding small problems before they become long compressor run times. Regular inspection cannot eliminate wear, but it can identify air loss, damaged wiring, poor battery performance, and moisture-related problems earlier. Pay attention to changes in sound and height rather than waiting for a complete failure.
A simple record of height behaviour and warning events is useful. It gives a technician a timeline and may reveal that a supposedly sudden failure developed over several weeks.
Testing for small leaks during routine maintenance
Check the vehicle’s parked height on level ground and look for one corner settling lower than the others. Inspect visible lines, fittings, and air springs for damage or contamination. When a leak is suspected, use an appropriate leak-detection method and repeat the check after the suspension changes position.
Small leaks are easier to repair before they overwork the compressor. They also tend to be less disruptive when found during routine servicing rather than after the vehicle drops fully.
Keeping the air intake and dryer system protected
Keep the compressor intake, filter, and dryer connections clean and correctly sealed. Water, dust, and degraded dryer material can reduce air quality and contribute to internal corrosion. Do not ignore a damaged intake hose or housing simply because the compressor still runs.
Protection is especially valuable in wet, dusty, or salty environments. Inspect exposed connectors and mounting areas for corrosion during underbody service.
Avoiding prolonged driving with suspension warnings
A warning that remains active means the system may not be maintaining the intended height or pressure. Continued driving can increase compressor temperature and place extra stress on air springs, lines, and valves. If the vehicle is low, leaning, or difficult to control, arrange appropriate assistance rather than continuing normally.
A short move to a safe location may be necessary, but repeated journeys while the fault is active can turn a minor leak into a failed compressor and a more complicated repair.
Maintaining battery health and charging performance
The compressor is a high-current motor, so battery condition, alternator output, grounds, and terminal connections matter. Weak voltage can cause slow operation, relay stress, or intermittent control faults. Include a charging-system test when suspension behaviour changes without an obvious air leak.
Battery maintenance is not a substitute for suspension diagnosis, but it removes a common source of misleading symptoms. Correct voltage gives the compressor and control module a fair test environment.
Following a preventive inspection schedule
Inspect the system at regular service intervals and after driving through water, mud, or heavily salted roads. A useful routine includes checking ride height, listening for unusual compressor operation, scanning stored suspension codes, and looking over lines and connectors. Keep records of parts replaced and symptoms observed.
The earlier a change is documented, the easier it is to identify the cause. Prevention is less about predicting the exact failure date and more about stopping extra compressor workload from going unnoticed.
Conclusion
Land Rover air suspension compressor failure should be diagnosed as a system problem, not assumed from one warning or noise. Check for leaks, pressure performance, electrical supply, sensor readings, and related component wear before choosing a repair. A correctly matched part, repaired root cause, and final calibration give the suspension the best chance of reliable service.
Frequently Asked Questions
What is the most common sign of an air suspension compressor problem?
Slow lifting, unusually long compressor operation, repeated cycling, or failure to reach normal height are common signs. They can also result from leaks, relays, sensors, or valves, so testing is needed before replacing the compressor.
Can an air leak damage the compressor?
Yes. A leak can make the compressor run more often and for longer periods as it tries to restore lost pressure. That extra duty increases heat and wear and may eventually cause the compressor to fail.
Why does the vehicle sit lower after being parked?
A low corner usually suggests a local leak in an air spring, line, fitting, or valve path. If the whole vehicle lowers, the problem may involve the reservoir, valve block, or multiple leaks. A compressor may be compensating until it can no longer keep up.
Can a suspension warning be caused by a weak battery?
It can. Low voltage or poor charging performance may affect the compressor, relay, sensors, and control module. Battery and charging tests should be performed alongside air-pressure and leak checks.
Is it safe to drive with a suspension warning?
Only limited driving to reach a safe location may be appropriate, depending on the vehicle’s height and handling. A vehicle that is low, leaning, or restricted to one height should be inspected promptly because clearance and stability may be affected.
Does replacing the compressor fix the entire suspension system?
Not necessarily. The original cause may be an air leak, faulty relay, damaged wiring, worn dryer, sensor, or valve. Those issues must be repaired or the replacement compressor may be overloaded and fail again.
Is ride-height calibration needed after a repair?
Some vehicles require calibration after compressor, sensor, air-spring, or related suspension work. The correct procedure depends on the system, so calibration should be completed with suitable equipment and followed by a leak check and road test.