

Key Takeaways
A steering-wheel vibration is easier to diagnose when you first identify exactly when it appears and where it can be felt. Start with the simplest checks, then move toward suspension, braking, and measurement-based inspections.
- Note whether the vibration changes with speed, braking, or acceleration.
- Inspect tire pressure, tread wear, sidewalls, wheels, and balance weights.
- Check alignment and steering or suspension components for looseness or damage.
- Treat shaking during braking as a reason to inspect the front brake system.
- Use correct torque, alignment, and follow-up maintenance to prevent a repeat problem.
Identify when and how the vibration occurs
The most useful first step in a Land Rover steering wheel vibration fix is to describe the symptom accurately. A shake that appears only around highway speeds points toward a different set of causes than a pulsing steering wheel under braking. Before replacing anything, record the road speed, driving condition, and whether the sensation is felt through the steering wheel, seat, or entire body of the vehicle.
Vibration at low speeds versus highway speeds
Low-speed vibration can come from a damaged tire, a bent wheel, a loose steering component, or a problem that becomes more noticeable while turning. At highway speeds, wheel imbalance, tire uniformity, and runout become common areas to investigate. A vibration that rises and falls within a narrow speed range is especially useful information for the technician.
Shaking during braking or acceleration
If the steering wheel shakes mainly when the brake pedal is applied, inspect the front brake discs, pads, and calipers before focusing on tire balance. A vibration that appears during acceleration may be related to driveline movement, engine mounts, or suspension loading, while one that continues at a steady speed often points back to the wheel and tire assembly. Note whether the vehicle pulls to one side at the same time.
Steering-wheel movement compared with whole-vehicle vibration
Movement concentrated in the steering wheel usually directs attention toward the front wheels, steering linkage, or front suspension. A tremor through the seat or floor can suggest a rear wheel, tire, or driveline concern instead. These patterns are not absolute, but they help prevent an unfocused inspection.
Warning signs that require immediate attention
Stop driving and arrange an inspection if the vibration is accompanied by wandering, a clunk, sudden pulling, a soft brake pedal, grinding, smoke, or a hot wheel. A visibly damaged tire sidewall or loose wheel also warrants immediate attention. Do not try to diagnose a serious handling change by continuing to increase speed.
Check the wheels, tires, and wheel balance
Wheels and tires are the most practical starting point because they are exposed to potholes, curbs, debris, and repeated heat cycles. A missing balance weight or a tire that has developed uneven wear can create a surprisingly strong shake. The inspection should be visual first, followed by pressure measurement and professional balancing when needed.
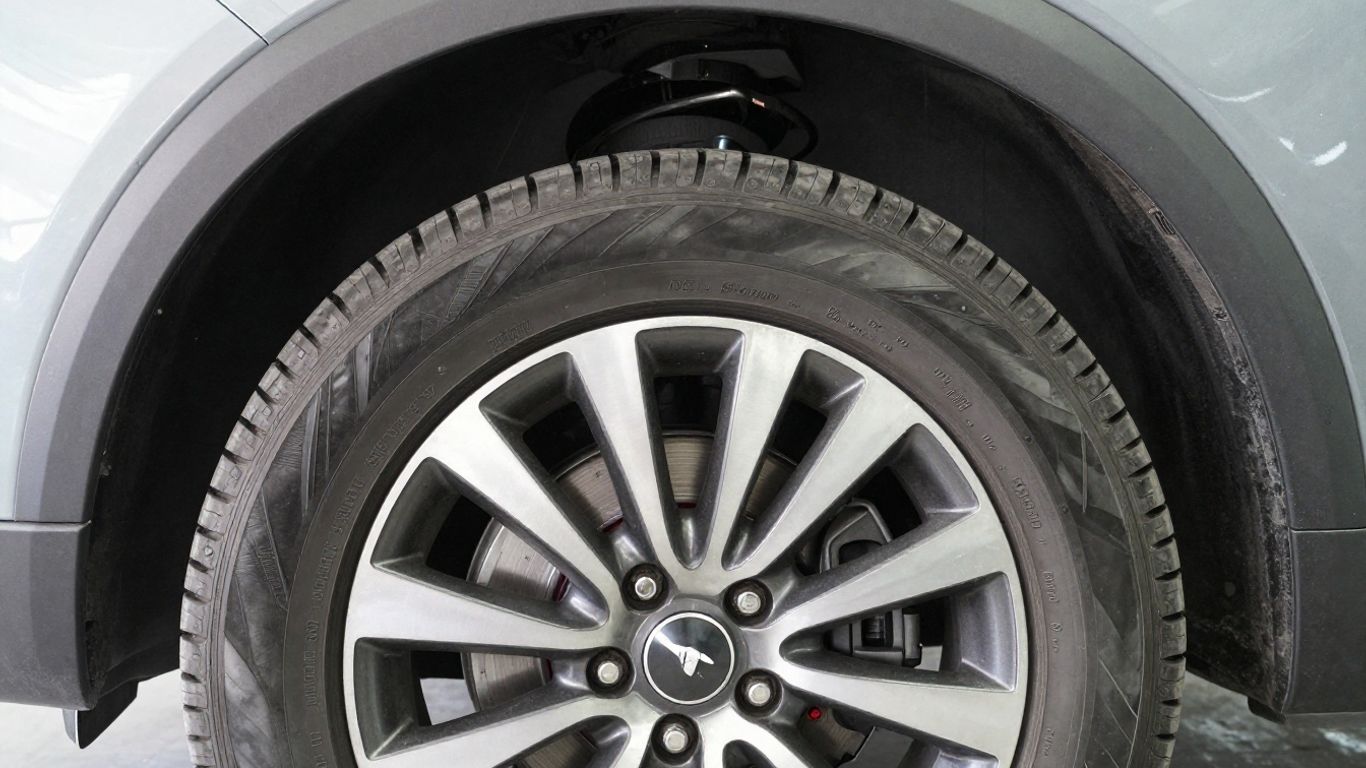
Inspect tire pressure, wear patterns, and sidewall damage
Check all four tires when they are cold, using the pressure listed for the vehicle rather than relying on appearance. Look for shoulder wear, cupping, feathering, flat spots, bulges, cuts, and tread separation. Uneven wear can be both a cause and a clue, so photograph the pattern before rotating or replacing the tire.
Look for bent wheels and damaged rims
A hard impact can bend a wheel flange without leaving an obvious crack. Inspect the inner rim as well as the visible outer face, and look for fresh scrape marks or a bead that does not sit evenly. A wheel that loses air slowly or shows measurable runout should be tested rather than assumed to be serviceable.
Correct wheel imbalance and missing weights
Wheel imbalance often becomes most noticeable within a particular speed band. Check for missing clip-on or adhesive weights, but do not simply add a replacement by eye; the correct position and amount must be established on a balancing machine. Reports of lost wheel weights are a useful reminder that a simple wheel issue can imitate a much larger steering fault.
Confirm proper tire mounting and road-force balancing
A tire can be balanced on a conventional machine and still have excessive uniformity variation or mounting irregularity. Ask the tire shop to verify bead seating, rim runout, and the balance result; road-force balancing can be useful when a normal balance does not resolve the complaint. The table below helps connect a symptom with the next sensible check.
| Observed symptom | First check | Possible direction |
|---|---|---|
| Shake at one highway speed | Balance weights and tire balance | Wheel or tire imbalance |
| Vibration at several speeds | Runout and tire condition | Bent wheel or damaged tire |
| Pulling with uneven tread wear | Pressure and alignment | Alignment or suspension issue |
| Air loss with visible rim damage | Bead and wheel inspection | Wheel or tire replacement |
Use the symptom as a guide, not as a final diagnosis. If balancing produces no meaningful change, move on to alignment and suspension checks rather than repeatedly balancing the same assembly.
Diagnose alignment and suspension problems
A wheel can be balanced correctly and still point in the wrong direction or move under load. Pothole impacts, worn joints, deteriorated bushings, and altered ride height can all change how the front wheels track. The inspection should compare actual movement and alignment readings with the specifications for the exact model and suspension setup.
Recognize symptoms of incorrect wheel alignment
Uneven shoulder wear, a steering wheel that sits off-center, and a vehicle that drifts on a reasonably level road can indicate alignment trouble. Alignment itself does not always create a high-speed shake, but it can create tire wear that later contributes to vibration. Check tire condition before treating an alignment reading as the only answer.
Inspect tie rods, ball joints, and control arms
With the vehicle safely supported, a technician can check for play in the tie rods, ball joints, and control arms. Torn dust boots, bent arms, or movement that is visible while the wheel is rocked are reasons for closer inspection. These parts influence steering control, so replacement should follow the vehicle’s service procedure rather than a guess based only on noise.
Check bushings, wheel bearings, and suspension components
Worn bushings may allow the wheel to shift during braking or acceleration, creating a changing steering sensation. A failing wheel bearing can produce noise, looseness, or vibration that changes while cornering. Inspect springs, dampers, mounts, and fasteners as well, especially after a heavy impact or off-road use.
Understand how lifted or modified vehicles affect steering vibration
Lift kits, altered wheel offset, larger tires, and non-standard suspension parts can change steering geometry and load. They may also make small amounts of wear more noticeable. If the vehicle has been modified, record the parts and ride height before diagnosis and make sure the alignment process accommodates that configuration.
Investigate braking-related steering shake
Brake-related vibration usually has a clear trigger: the steering wheel begins to pulse or shake as the vehicle slows. Heat, uneven friction material transfer, disc thickness variation, and a caliper that does not release properly can all be involved. Because braking faults affect stopping control, this section deserves more urgency than a comfort-only vibration.
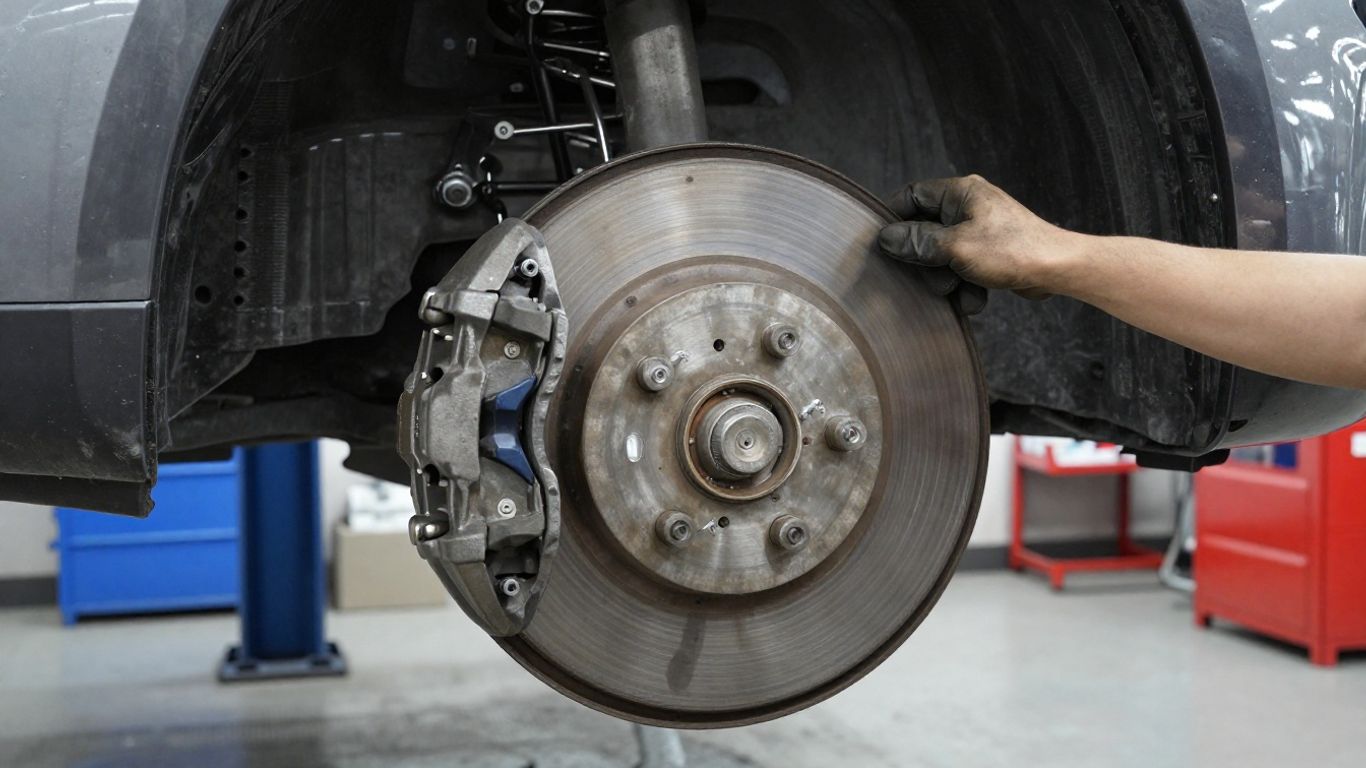
Distinguish warped rotors from uneven pad deposits
The phrase “warped rotor” is often used for several different brake-surface problems. Uneven pad deposits can create a friction change that feels like disc distortion, while disc thickness variation can produce pedal pulsation and steering shake. The distinction requires measurement and inspection, not just a visual glance at the disc face.
Inspect front brake discs, pads, and calipers
Look for scoring, cracks, heavy corrosion, uneven pad thickness, and signs that one pad is contacting more strongly than the other. Measure disc thickness and runout against the applicable service limits. Also check slide pins, pad movement, and caliper mounting hardware for corrosion or restriction.
Check for sticking calipers and overheating
A sticking caliper can leave one wheel hotter than the others and may cause a pull, burning smell, accelerated pad wear, or a recurring vibration. After a cautious drive, unusual heat at one wheel is a reason to stop and let the vehicle cool rather than touching the brake components directly. Persistent overheating should be diagnosed before further driving.
Know when brake resurfacing or replacement is appropriate
Resurfacing is only suitable when the disc can remain above its minimum thickness and the underlying cause is corrected. A disc that is cracked, severely scored, below specification, or repeatedly affected by heat generally needs replacement. New pads should be installed and bedded according to the correct procedure, with both sides of the axle considered together.
Use a step-by-step Land Rover troubleshooting process
A careful process saves time because it separates simple wheel issues from faults that require measurements or component replacement. Begin with safe observations and avoid changing several variables at once. If the vehicle feels unstable or braking performance is impaired, skip the road test and arrange professional assistance.
Start with the simplest and safest checks
Confirm tire pressures, inspect the sidewalls and tread, look for missing balance weights, and check that the wheel nuts appear properly seated. Review when the vibration started and whether it followed a tire change, pothole impact, brake service, or suspension modification. These first observations often narrow the next step without dismantling anything.
Test-drive under controlled conditions
Only test-drive when the vehicle is safe, the tires are sound, and braking feels normal. Use a quiet road, increase speed gradually, and note whether the vibration occurs while coasting, accelerating, braking, or turning. Do not recreate a severe symptom at excessive speed simply to make it easier to feel.
Measure component wear against service specifications
Visual inspection cannot establish whether a disc, bearing, joint, or wheel is within tolerance. Record measurements such as tire pressure, wheel runout, disc thickness, disc runout, and alignment angles where appropriate. The following sequence keeps the investigation orderly:
- Inspect tire condition, pressure, and wheel security.
- Balance and check runout on the suspected wheel assemblies.
- Inspect steering, suspension, and wheel-bearing movement.
- Measure brake components if the shake occurs during braking.
- Complete alignment checks after worn parts are corrected.
This order starts with accessible causes and reserves more involved testing for situations where the earlier checks do not explain the symptom. It also creates a useful record for deciding whether a part genuinely needs replacement.
Decide when professional diagnostic equipment is needed
A balancing machine, road-force balancer, alignment rack, dial indicator, brake micrometer, and lift can reveal faults that are difficult to identify at home. Seek a qualified workshop when the vibration is persistent, a component has measurable play, or the vehicle has been modified. A clear description of the symptom and the checks already completed will make the appointment more productive.
Complete the repair and prevent vibration from returning
The final repair should address the cause rather than only the sensation. That may mean balancing or replacing a tire, correcting alignment, renewing a worn joint, servicing a caliper, or replacing brake components as a set on the affected axle. Once the work is complete, confirm the original symptom has actually disappeared under safe conditions.
Torque wheel nuts to the correct specification
Wheel nuts should be tightened in the correct pattern with a calibrated torque wrench and the specification for the exact vehicle. Over-tightening can affect wheel seating and future service, while under-tightening is a serious safety risk. Recheck only when the manufacturer or repair procedure calls for it, rather than applying a universal rule.
Replace worn or damaged steering and suspension parts
Replace components that are bent, cracked, excessively loose, or outside service limits. Use parts that match the vehicle and the existing suspension configuration, especially when sourcing used, genuine, or aftermarket components. After installation, verify that fasteners are tightened correctly and that no brake hose, sensor wire, or boot has been disturbed.
Perform an alignment after suspension or steering repairs
Changing a tie rod, control arm, joint, or other geometry-related component can alter wheel angles even when the steering wheel appears centered. An alignment after the repair confirms toe, camber, and related angles are appropriate for the vehicle. It also protects the tires from the uneven wear that can bring the vibration back.
Schedule follow-up inspections and regular tire maintenance
Check tire pressures regularly, inspect tread and sidewalls, and watch for new wear patterns after the repair. Revisit the workshop if the vibration returns, changes character, or is joined by noise or pulling. Consistent maintenance is less costly than allowing a small imbalance or worn component to damage neighboring parts.
Conclusion
A Land Rover steering wheel vibration fix begins with careful observation, not immediate parts replacement. Separating speed-related vibration from braking shake, checking wheels and tires first, and confirming suspension, alignment, and brake measurements will lead to a safer and more dependable repair.
Frequently Asked Questions
Can unbalanced tires cause steering-wheel vibration?
Yes. An imbalance in a front wheel and tire assembly can create a shake that is strongest within a particular speed range. Balancing should be checked along with tire condition and wheel runout.
Why does the steering wheel shake only when braking?
Brake discs, pad deposits, disc thickness variation, or a sticking caliper can create a vibration during deceleration. A brake inspection and measurement are needed to identify the cause.
Is a bent wheel always visibly damaged?
No. A wheel can have runout or an inner-rim bend that is difficult to see while mounted. A balancing or wheel inspection machine can detect problems that a visual check misses.
Can bad alignment cause a vibration?
Alignment more commonly causes pulling, an off-center steering wheel, or uneven tire wear, but the resulting tire damage can contribute to vibration. Alignment should be checked after correcting worn components.
Is it safe to drive with a shaking steering wheel?
It depends on the cause and severity, but a new or worsening shake should not be ignored. Stop driving if there is pulling, looseness, grinding, overheating, tire damage, or reduced braking performance.
Should brake rotors be resurfaced or replaced?
Resurfacing may be possible when the disc remains within minimum thickness and is otherwise serviceable. Cracked, severely scored, undersize, or repeatedly overheating discs generally require replacement.
What should be checked after a suspension repair?
Confirm fastener torque, wheel security, steering movement, and brake or sensor routing. An alignment is usually appropriate after repairs that can change wheel geometry, followed by a controlled check for the original vibration.